How to install RAM
If memory serves, this is how you install DDR4 or DDR5 kits
Installing RAM takes mere seconds – honestly I feel a little silly for even having an entire page dedicated to explaining how to do it. The only possible complexities come from making sure you have the right kind of RAM for your system, and that you’re inserting each stick of memory into the right slot. But these are easily done as well, making RAM installation both the most painless part of building a PC from scratch and a dead simple way to upgrade your rig in the future.
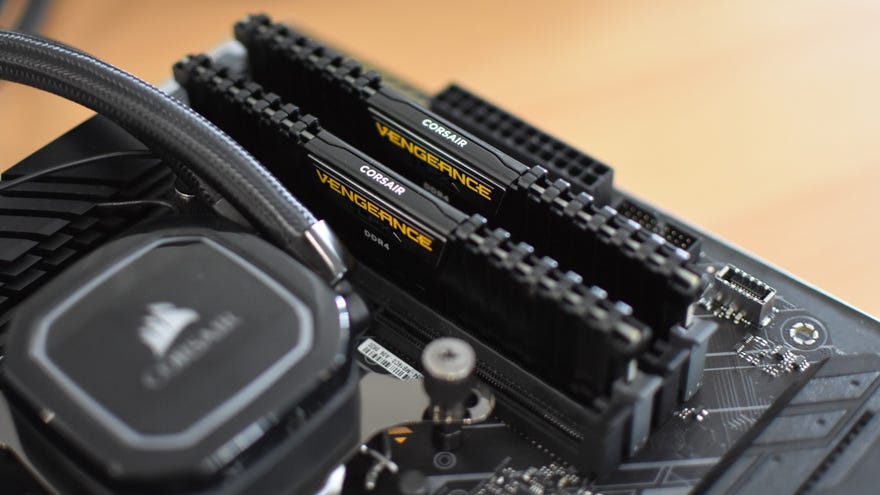
By "the right kind of RAM", I’m talking both the form factor and the memory type. For desktop PC builds, you’ll be needing DIMM sticks of either DDR4 or DDR5 memory; for extremely small PCs, like Intel NUC systems, you might instead need more compact SO-DIMM sticks instead, which can come in DDR3, DDR4, or DDR5 varieties. Let’s focus on installing DDR4 and DDR5 DIMMs for now, as these will be your main options for a conventional gaming PC.
DDR4 and DDR5 RAM sticks are installed in pretty much the same way, but they’re not cross compatible. Even though some CPUs might work with both types, motherboards can only support one or the other, not least because the slots you’ll install them in are slightly different. Get memory that doesn’t match your motherboard specs, and those sticks of RAM might as well be sticks of butter. All RAM is clearly labelled as either DDR4 or DDR5, though, so that would be a pretty hard mistake to make.
As with installing the CPU, this is another PC building step you can complete on the motherboard before mounting the latter inside your case. Which you'll get to do very shortly, assuming you’ve been following along with our guide, so get the RAM installation out the way and your handbuilt PC will soon take its proper shape.
How to install RAM (the standard DIMM kind)
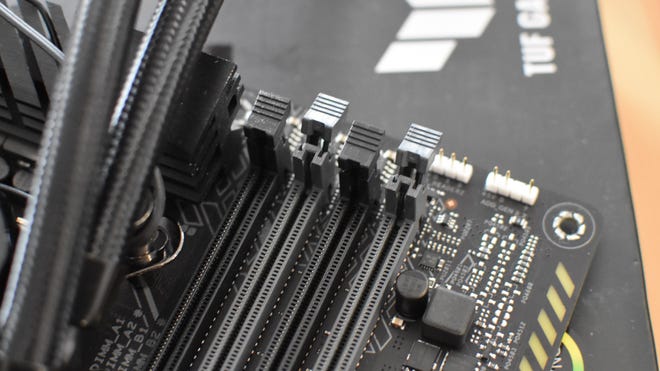
Step 1: Having made sure your RAM type is compatible with your motherboard, find the RAM slots on the motherboard – they’ll be next to the CPU socket. The number of available slots usually varies between two and eight, with a four-slot setup the most common.
Unless you have enough identical RAM modules to fill every single slot, here comes the important part: ensuring that you insert each stick into the right slot. Please do consult your mobo’s manual at this point, as configurations can vary; for a four-slot layout you should generally fill the second and fourth slots (counting from left to right) first, but again, check what your specific motherboard needs.
Once you’ve ID’d the correct slots, open their plastic retention clips by pushing them down and outwards. Like so:
Step 2: Line up the little notch on the bottom edge of your RAM stick with the slot. DDR4 and DDR5 sticks have this notch in different places, so you’ve somehow ended up with the wrong type... this is a good way of figuring that out, I guess?
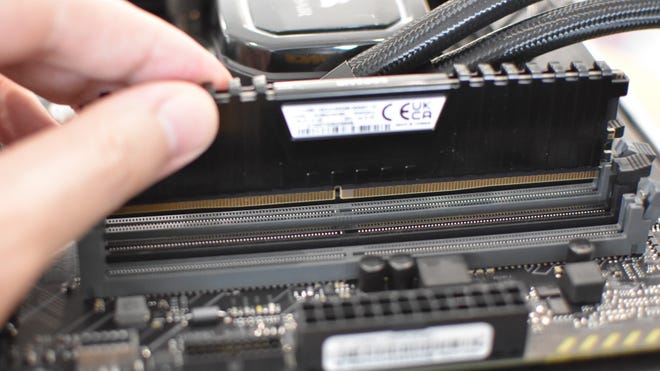
Step 3: Slide the stick downwards into the slot, and push firmly on it until you feel it click into place. The clip on the sides will snap back into place as well, securing the stick. Repeat for any other sticks you have, again making sure to follow the slot numbering scheme.
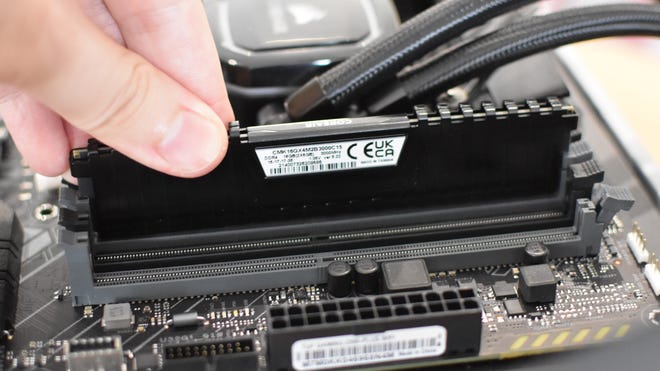
If you ever need to remove your RAM, just push the clasps down to release them again, then pull the stick upwards out of its slot.
Hold up there, pardner
A lil' note for those following our PC building guide: for the sake of keeping all storage installation instructions in one place, our guide to installing an SSD comes later on. But, if you specifically have an NVMe/PCIe SSD to install, you have the option of doing so now, before the motherboard goes inside the PC! Just skip to that storage section of the guide and follow the steps on installing an NVMe SSD.
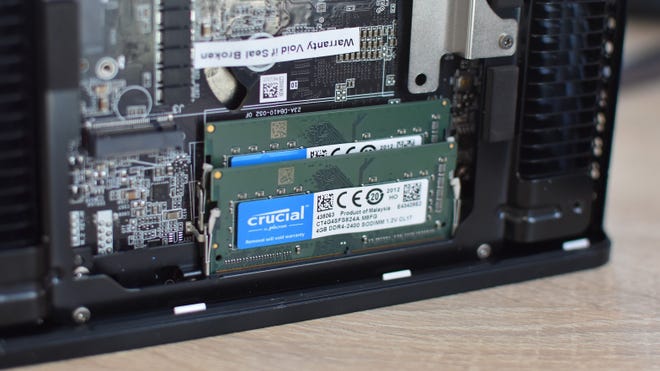
How to install SO-DIMM RAM
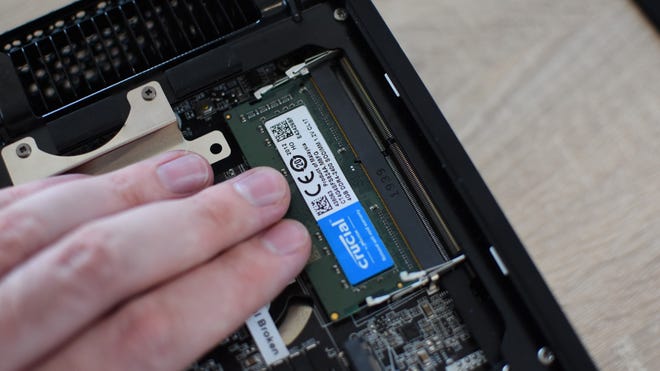
Again, this part only concerns miniature PC builds that require the much smaller and thinner form factor of SO-DIMM RAM. Building a PC is building a PC, though, so let's not leave out these dinky sticks entirely...
Step 1: Locate the memory slots, which unlike standard DIMM slots are usually oriented horizontally. If your PC has more than one memory slot, start with the one on the bottom. Grab a stick of SO-DIMM RAM and line up the notch on the bottom edge so it will fit in the slot.
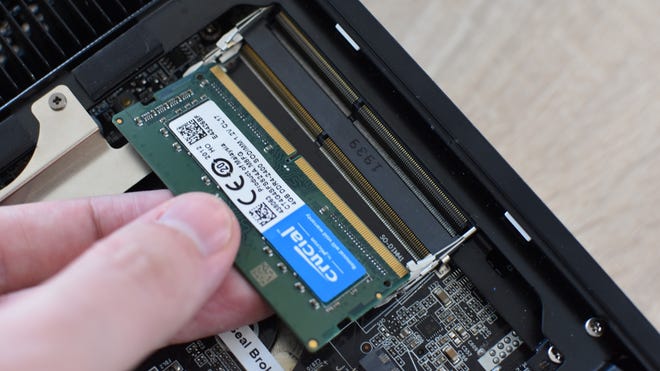
Step 2: Push the RAM into the slot until the copper contacts are fully concealed inside. It might point outward at an awkward-looking angle, but don’t worry – it’s not bending unduly.
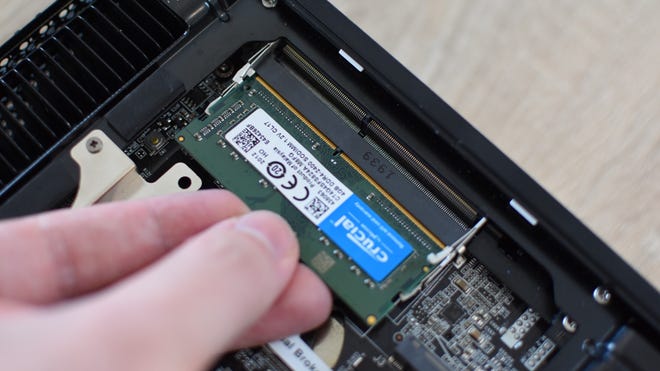
Step 3: Gently but firmly, push down vertically on the RAM until the metal arms either side of the slot click into place. Repeat for any other sticks/slots, and if you ever need to remove a stick, pull the metal arms away until it springs loose. You can then simply pull the stick out of the slot.
